The majority of natural dying is done with natural fibres as loose fibre, yarn, or small pieces of fabric like silk scarves. These preparations are easy to dye due to their loose construction, and small size. Even a large skein of yarn will flow and move within the dye vat to provide even coverage.
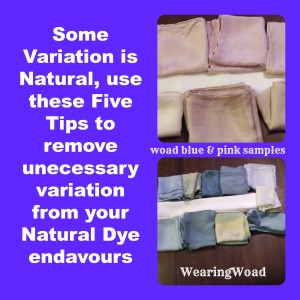
Natural dyeing yardage is a slightly different equation. Yardage is bulky, can be difficult to handle, and loves to bunch up or fold in the dye vat. Naturally dyed yardage will have inequalities in the dye, and variations in the colour and tone of the dye job.
Due to the differences, here are my five top tips for naturally dyeing yards of fabric.
1. Use a large, or giant pot
Many natural dyers use small one gallon dye pots. When dying yardage, the larger the pot the better as a higher liquid volume enables the dye to flow around and into the fabric. I would use a four gallon pot for a three to five yard piece of silk fabric. Wool fabric may need a larger pot, or slightly smaller yardage since it is bulkier than the silk.
2. Thoroughly scour cloth
Yarn and loose fibres are washed before dying to remove oils, vegetable matter, and grease. In the case of yardage, it will have oils left in it from both the spinning and the weaving process. For the evenest dye coverage a thorough scouring is necessary to remove all excess oils. Any remaining oil can act as a resist and prevent the natural dyes from adhering.
3. Keep the fabric under the dye liquid
The larger the fabric the more likely it is to collect air bubbles. These bubbles will float the fabric to the service where it will lose contact with the dye liquid. Any floating fabric will end up a lighter shade than fabric that remains immersed in the dye bath. I have used everything from chopsticks, to PVC pipe, to bricks to keep fabric from floating. Making sure the fabric is completely saturated after scouring and putting it directly into the dye bath can also help prevent floating.
4. Don’t let the fabric fold or bunch
Folds act as stressors on the fabric and attract more dye molecules. Areas of fabric that are folded or severely bunched will become a darker shade than the rest of the fabric. To prevent folding or bunching, take the scoured and rinsed yardage and slowly lower it into the dye bath in a circular pattern. This will lay the fabric evenly in the dye bath, and hopefully prevent most folding and bunching.
5. Proper mordant and temperature
The key with any successful natural dye venture is proper mordant usage and temperature. If the dye calls for boiling, but you are dyeing wool or silk, a gentle simmer can have the same impact without harming the fabric. The safest mordant is alum, though you can adjust some natural dye colours using basic or acidic after-baths, as well as iron, copper, or tin after-baths. Some mordants are toxic, so use proper precautions when utilizing them as after-baths or the stand alone mordant.
A Reminder
Natural dyes will vary depending on growing conditions, plant type, water pH, and many other uncontrollable variables. The fun of natural dyes lies in the experimenting. These tips should help you avoid some of the common reasons for unequal dye coverage or dye failure. Just remember, if one natural dye doesn’t work there is nothing stopping you from over-dying the same fabric with a different dye.
Back to You:
These tips are to help you get the best value from your natural dye bath. Have you dyed yardage before? What was your experience? Do you have any additional tips for dyers who have never dyed yardage before?
Leave a Reply