Sitting here, in the middle of winter, means nights that are long and cold. Going to bed’s no fun, the bed’s cold! And waking up is even less fun, the house is cold! A nice homemade microwavable flax bag is a perfect way to ward off winter’s chill, and keep your back, shoulders, or neck nice and toasty warm.
Actually, a flax bag is equally successful in summer as you can chill the bag and use it to cool down after a long day in the garden. Or, to help you sleep when it’s just plain too hot.
The basic heating pad is a long and narrow cloth bag, filled with beans, cattle corn, rice, cherry pits, or flax. Depending on the size, two or more channels can be made to spread out the contents and make the bag easier to use. A hand-sized bean bag, made with a 2 2×2 inch squares, or a 4×2 folded rectangle, can get by with a single row of sewing to split it into two channels. A long and narrow neck warming bean bag usually works best split into three channels, with two rows of sewing.
Materials for One Neck Warming Flax Bag:
Sewing Machine: While I prefer to hand-sew, this is one project that is quick and easy on a machine. In fact, even with my machine nerves and still learning how to use it, it only took 2 hours to make one flax bag. If I used the machine more often, it would be even quicker.
Pins: Use pins that you can easily see to remove when sewing. It is all straight seams, so with straight edged fabric you should be fine with minimal pinning. Use just enough to keep the sewing on track.
Cotton Thread: Thread in a complementary colour to the fabric you are using will help the bean bag look nice. Alternatively, use a contrasting color for more visual fun.
Cotton Fabric: You will need a piece of fabric approximately 6-8 inches wide and 30 inches long. I prefer a 100% cotton fabric with a moderately soft hand. Use fabric with a pattern you like, or use plain fabric and use your favorite soft or fancy fabric to make a slip cover.
Flax or your chosen filler: The finer the filling material the softer and more comfortable the bag will be. I like flax because it is small, fine, and has a lot of oil which holds heat. Small beans, like lentils, or rice, can also work. I have seen smaller heating bags made with corn, as well as larger beans.
For this project, I used a piece of cotton fabric that looked like a scene which I had gotten in a bag of miscellaneous fabric from the local thrift store. I know it is cotton because I did a burn test on a few threads. How do I know from burning it that it is cotton? It smelled like plants and left ash. Wool smells like burnt hair and self-extinguishes, and polyester, acrylic, and rayon all burn into a nasty little plastic-y blob. Never put a match to a large piece of fabric, just take a few threads, hold them in tweezers, and then apply and remove the match.
Making Your Own Flax Microwavable Heating Pad:
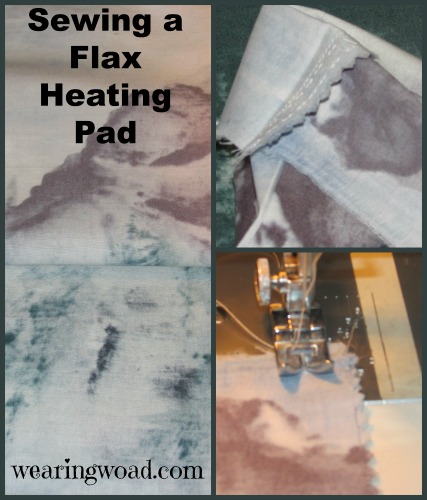
Start by folding your piece of fabric in half, width-wise, with the right side facing in. Pin the long edge and one of the short edges. A touch with an iron can help you make sure the fabric is evenly spaced and neat, before pinning.
Stitch the short end closed, and then the long side with a 1/3rd inch to half inch seam allowance. If your sewing machine has serge capabilities then serge outside the initial seam line, if it does not then add an extra seam on the outer side of the first seam.
The double stitching will keep the bag contents from spilling everywhere if the first seam gives.
Once the outer edges are stitched, turn the bag right side out and press.
Right now, your bag should look like a long tube. Now, determine approximate thirds and (if you’d used the serge) set your machine back to a regular stitch. Then, stitch up the length of the bag to divide it into three channels. This will require two rows of stitching. Stop the stitching approximately an inch, to an inch and a half, from the open end of the bag.
Once you have both channel seams stitched, grab your chosen filler, a funnel, and a cup measure.
Filling the Flax Bag:
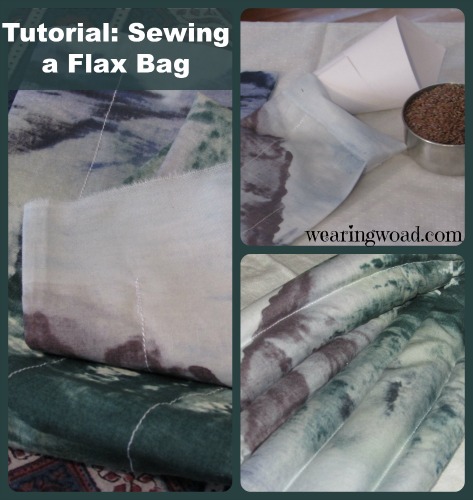
If you do not have a funnel with a point that will fit inside your flax bag, grab a piece of printer paper. Fold the paper in half, and make a solid cone. Tape the edge of the paper on the outside, and the inside. Then, simply cut the point to a size that lets the flax through easily. It may take more than one trim to get something you are comfortable with.
Fill the flax bag to within an inch of the where the channel stitching ends. If you have a longer bag, or you prefer it lighter and more flexible you can fill it less.
Keep the bag straight, or straighten it out, during filling to make sure the contents settle evenly. Use a small cup measure, about a half cup size, can make the filling easier and enable you to know roughly how much flax, beans, or whatever, you are using.
For the bag I made, filling it consumed about 4 cups of flax seed. A smaller bag would use less, while a longer bag would be likely to use more. 
Three channels can be a challenge to juggle, for filling. So, use a pin and fold the fabric over in the channel to seal in the contents and prevent it spilling while you finish filling.
Working on a cookie tray or cloth is a good idea, otherwise flax could end up everywhere.
To finish your bag, fold the raw edges of the open end down into the bag and pin together. There should be folded edges exposed, not an edge. This gives a nice finished edge on that side. Run a seam over the folded area to close the bag.
Seed Heating Pad Variations:
There are many variations on the classic microwavable seed heating pad. The simplest version is made by filling a solid, but single, sock with beans, knotting the top, and heating it. Another method is to make smaller square bean bags that can be used as hand warmers. Heated and left in pockets, they help handle the initial chill of a cold car, or a long walk when there’s a cold wind blowing.
I’ve also seen seed bags, and flax bags, that had lengths of anywhere from 18-30+ inches. And a few that were only about 6 inches long. The shortest ones were filled with cow corn, which doesn’t pop in the microwave.
Using Your New Flax Bag:
Microwavable flax bags can be used either hot, or cold. To heat your flax bag, place in the microwave for approximately 95 seconds. This should make it hot enough to be a comfortable, but non-burning temperature. The heat is caused by the oil getting excited, and within a minute or five the temperature of the bag should begin moderating down, if over hot a few minutes are all it takes to bring the flax bag back to a comfortable level. One heating will last between 40-60 minutes. The longer time is if the flax bag is held under something insulating, like a wool shawl or blanket.
If you made a cover for your flax bag, take it out of the cover before heating it. Microwaves can end up with lots of stray bits, oils, and other stuff that you probably don’t want on your bag cover. I place a clean paper towel under my flax bags when I heat them, which helps keep them clean.
If you have a woodstove with a warming closet, you can tuck your flax bag in there to warm. However, it should be done only when your stove is at a moderate temperature and won’t spike, and the flax bag should only be left in for 30 minutes at a time. Otherwise the fabric could begin to be discoloured by the heat reacting with the oils from the flax. If the stove gets very hot then the presence of the flax seedbag in the warming cabinet could become a fire hazard.
Note: A seed heating pad cannot be washed, and flax bags should not be gotten wet at all. You can clean your flax bag, if you un-pick the final end-seam and empty out the contents. Then wash the emptied bag, and refill with fresh flax . If a bag accidentally gets wet, it is fine if you dry it immediately (next to a stove is best), don’t heat a wet bag in the microwave. The fabric may be discoloured by the seeds. If a bag has been wet for an unknown length of time, dry it out and then heat it, if it smells musty then the seeds have mildewed and the entire bag should be discarded. If it does not smell musty, you can continue using it.
You can also use the flax bag cold. Simply tuck your flax bag inside a Ziploc bag and tuck into the freezer for a few hours. When you take it out, the bag will be nice and chilled. It can act as a flexible and safe ice-pack for kids, or as something cooling when trying to sleep during summer.
Back To You:
If you found this little tutorial useful or interesting, leave a comment! How do you use your flax bag?