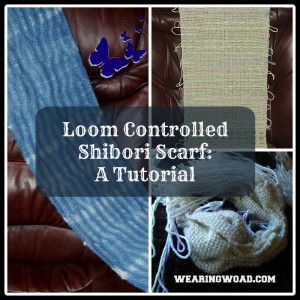
Shibori is the ancient Japanese art of indigo dying. Utilizing resists on fabric, and the richest of indigo vats, Shibori is one of the best ways to highlight the subtlety of natural indigo dye. This is a simple tutorial on creating a loom-controlled Shibori scarf, or wrap. First let’s answer one basic question, what is the difference between loom-controlled Shibori and regular Shibori? It’s simple, in regular Shibori you stitch and tie an already fully woven piece of fabric. In loom-controlled Shibori you insert the resist threads well you are in the process of weaving the item. It’s a fun challenge, and can give beautiful results.

Weaving Ingredients:
For this project I used one 12 inch Ashford Knitter’s Loom. Any Rigid Heddle Loom or Table Loom will also work.
I also used 2 100 gram balls of worsted weight wool/kid mohair blend for the weft and warp. Any fully natural fiber yarn will work for this, but protein fibers, like wool, silk, and mohair, take a deeper shade of indigo compared to bast and cellulose fibers.
For the resist thread, I used conventional dish-cloth cotton of a knitting weight. You can use any thread you want for the resist, provided it is strong enough to handle being pulled tight and tied.
The Weaving Process:
Warp the loom as wide as you want your scarf, on the Ashford knitters loom I used the full 12 inch width. The warp should be about 6 feet long for a good scarf length. A narrower scarf will require less wool than I used. For a Rigid Heddle Loom it naturally warps in plain weave, since the scarf’s design will come in the dying process warp for plain weave even if you are using a table loom.
After completing the warping, decide what design you want to make with your floating weft, resist threads. Where the threads go through the fabric is where the resist will be tightest and therefore whitest.
Insert your spacers, and weave anywhere from 10-20 rows before beginning to insert the resist threads. The spacers at the start will be turned into your fringe after the scarf is fully woven.
The pattern I used was over-four, under-four for four rows, with 4 rows of normal weft between each row of floating warp. And then reversing the patter for under-four, over-four for another four rows before repeating the first section. As you can see from the picture, it gave a slight monk’s belt pattern in the resists.
Note: On a table loom you can program the extra heddles to be your floating weft, resist thread, pick up.
I also did some extra weft picks in one section, 36 of them, to form a solid block of the darker indigo shade.
After you have completly woven the full length of your warp. Cut the web from the loom, and tie your fringes. Once the fringes are tied, admire your floating weft and nicely woven scarf before continuing to the next step.
The Shibori:
To create the resist, pull your floating weft threads tight and knot them in sections. Usually take one “block” of floating weft at a time. When I did it, each “block” was 4 threads due to my pattern. Yours maybe wider or narrower. The beauty of Loom-Controlled Shibori is that it the weaving and resisting is a single process. Once you take it off the loom, prepare your fringe, and pull the resist threads tight, you are ready to dye it.
Prepare an indigo, or woad indigo vat. You can find instructions for dying from a woad extraction vat here.
If you want more information about Indigo in general. There are a few good books available as resources.
Once you have prepared the indigo vat, pre-soak your scarf. When the scarf is fully saturated, vat the scarf for 15 minutes, and then oxidize for 15 minutes. The more times you vat and oxidize the darker your blues will be, and the brighter your white resist zones will be. The goal of traditional shibori is to imitate the night sky, with a deep indigo vault and clear white stars sparkled throughout.
After completing the dyeing process, let the scarf sit overnight (for about 12 hours) and then rinse and untie. After untying, wash in warm water with soap, rinse in cold water and shock the scarf a few times.
Woven wool should be partially “fulled” in the washing process. Fulled means slightly felted. If you stick a finger against the web and your finger can easily poke a hole in it, or be seen through it, then it is not fulled enough. A well-fulled scarf should feel slightly heavy, but still drape well, and be slightly fuzzy. Be careful not to over-full the fabric, but don’t under full or it can catch on objects and become damaged.
The Final Step in Loom-Controlled Shibori:
Let your scarf dry, admire it, and wear it!
I hope you enjoyed this tutorial. If you chose to follow it, or adapt it, let me know. I love creatively sparking people, so if this gave your creativity a boost let me know. Feel free to leave a comment!
Leave a Reply