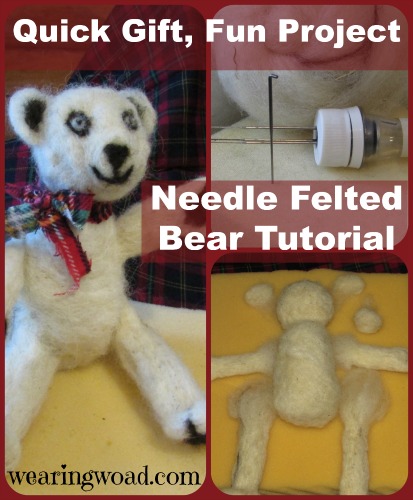
Sometimes a quick project is essential, there’s a Birthday in a few days, or Christmas is at the end of the month and life is hectic. This little needle felted teddy bear can be completed in just 2-3 hours, and can be personalized to fit the personality, or hobbies, of the person you are creating it for. The project itself is fun, and can even be done by children. I created my first needle felted bear when I was 12, and since then have taught the basics of needle-felted bears to people ranging in age from 8-80. I will admit that the 8-12 kids usually pulled in parental help, but the bears always turned out fantastic.
I would like to add that, at least with needle felting, smaller does not mean easier. In fact, a roughly hand-sized bear is the easiest size to needle felt, anything smaller is much more difficult since it is easier to poke yourself. Anything larger than hand-sized takes longer due to the larger amount of wool that you need to felt down. 
Needle Felting Basics:
Needle felting is a simple way to sculpt wool into any 3D object you can imagine. Basic needle felting techniques needed to make a bear include, knowing how to make a ball, a log shape, and how to use your needle to do basic shaping. Of course, also knowing how to avoid breaking your needle, or poking yourself, is also beneficial.
To shape an indent in needle felting, you poke that location multiple times with your felting needle. The more you poke the harder the felt becomes in that spot and the smaller/tighter that spot becomes. In a round shape, this repeated poking can be used to create a 3D muzzle, and cute little eyes on any bear.
People of any age can enjoy needle felting, and the technique is quick and easy to do once you understand the basics. If you are just getting started with needle felting, I would recommend beginning with a needle-felted ball to accustom yourself to how the needle and wool work together.
Needle felting is a quick technique, and a hand-sized or slightly larger teddy bear will usually take less than two hours for someone who knows what they are doing. For someone who is new to the technique, it may take three hours to create a firmly felted bear.
Materials for a Hand-Sized Needle Felted Teddy Bear:
50g Wool – Polworth or Coridale roving is preferable. However, as long as the wool will felt you can use whatever you have on hand. I used a hand-carded lot of Romney wool, though commercially prepared roving gives a more uniform result.
You will also want wool roving scraps in brown or black for eyes and other details, also some in other colors if you intend to dress up your bear, and seed-beads to add a sparkle to the eye if you desire.
Felting Needles and/or a student (two or three needle) felting needle punch.
A foam block to needle felt into.
Needle and Thread to secure head and limbs if you intend to give the bear as a gift, or if it will be around children.
How To Needle Felt a 3D Teddy Bear:
Step One: Form a ball of wool, only slightly larger than the size of the bear’s head. Usually something that will fit comfortably in your palm will make a good sized bear head. Felt the wool bear’s head into a moderately solid ball. However, do not felt it completely down as you want it to be a little soft for later detail sculpting.
Step Two: Take roughly twice the amount of wool as you used in the head, and use this to form the bear’s body. A good bear body is roughly pear shaped. The body should be felted slightly firmer than the head, you will be attaching the limbs via felting (and sewing) later on, but the body does not need to be soft for this. If you want to leave the tip of the narrow part of the “pear” slightly softer it will facilitate the attachment of the head.
Step Three: Create arms using “logs” of roving. A three to four inch long, narrow strip of roving doubled will usually make one arm comfortably. If you double the roving, the fold is where the paw will be, and the loose ends will help facilitate the arm-to-body attachment.
Step Four: Create legs using roughly one third more roving than you used for the arms. With the legs, you will want to have a bit of an upturned foot, so do not double the roving but work in a single straight log. One loose end you will shape for the foot, and the other you will leave loose to facilitate attachment.
Step Five: Take smaller amounts of wool and needle felt one small amount into a ball for the muzzle. Take another two equally sized small amounts and fold the wool over into a rough ear-shape, and needle felt some ears. Leave a loose part on the underside of the muzzle and on the under-side of the ears for attachment purposes.
Step Six: – Assembling: Needle felt the ears, and muzzle onto the head. Also shape for the eyes and felt the head down a bit more. Then needle felt the arms and legs to the bear’s torso. Try and position the legs and arms so that they are equal. This is also the time to decide if you want your bear to have one arm raised, lowered, and needle felt the limbs into the pose you want.
Step Seven: Needle felt the head onto the body. Needle the head joint well, both down from the head, and up from the body (turn the bear onto its head to facilitate this). You can also poke the needle down through the top of the head and needle around the neck joint from the inside – just make sure not to pull the needle all the way out each time.
Step Eight: Secure head and limbs, if desired, with a needle and thread.
Step Nine: Use your darker colors to add detailing to ears, muzzle, eyes, and paws. Layering dark and light in the eyes can give you a more realistic look as well. Once you have the fine detail done, needle felt colored fiber on as “clothes” or needle felt a flat cloak, shawl, or even a hat.
Step Ten: Admire your bear (and send me pictures!) 😉
Needle Felted Bear Variations:
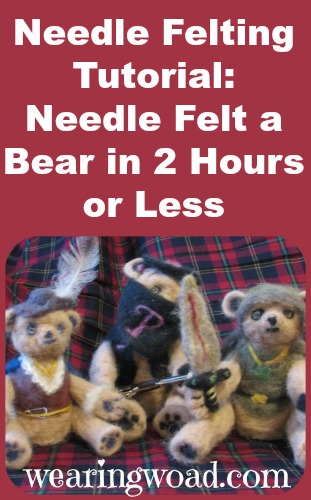
You can make more than bears with needle felting, and if you do make bears they can be far more intricate than the one detailed here. In the past, I created a jester bear (complete with tri-petaled hat), an opera bear, French Musketeer bear (with rapier), one bear inspired by Aragorn of Lord of the Rings, and even a Robin Hood bear (with bow). Using needle felting in general, I have created rabbits, an owl, and even a flower bouquet. However, the one thing I haven’t done is figured out how to make an elf bear, or a Vulcan bear, what would you do with the ears?
Back To You:
What do you think of this needle-felting project? What have you done with needle felting?
Leave a comment, I enjoy hearing from you!
