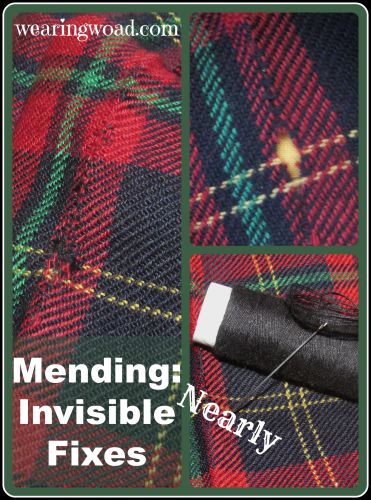
Sometimes a mending project just seems hopeless. How do you mend a perfectly round hole in an otherwise spotless pair of shorts? What about an oblong wear spot along the pleat of a skirt? Or a spot that’s straight, but too wide to draw together and you don’t want to put a patch in just that spot? 
The answer is a woven mend. You use thread, or yarn, to weave across the hole and create a new fabric surface without drawing the edges together to form a seam, or adding a patch. Technically you are needle-weaving your own patch. This technique works like a charm on small holes, either caused by moths or by tears, that are of a shape that cannot be straight stitched, and you don’t want to have a patch there. I’ve used this technique with good results on a hole in the seat of a pair of shorts, a worn moth hole on the side of a fine-knit sweater, and on a wear/moth hole on the pleat edge of a woven skirt.
If you have a larger hole that this technique will probably not work on, go check the article on Mending the Impossible: Making due with the Minimum.
Step One: Evaluate
Always, always, evaluate before you start mending. Sometimes you will realize there’s an easier technique to use (ripping up for scrap counts), or that the technique you were going to use is not ideal for this particular rip. Don’t be afraid to check the look of different mending techniques before you start. Lay or pin a potential patch over the hole, and evaluate. Do you mind having a patch, or do you want to make it as invisible as possible?
Step Two: Gather Materials
For a woven patch fix all you need is a needle, and a matching or nearly invisible thread colour. For the pleated skirt, due to it’s being a tartan, I chose black. I had a red, but no navy, and the red looked like it would stand out more than the black. So, I went with black to make the patch as invisible as possible. Which is the idea with the woven patch.
Step Three: Mending
Start on the narrowest part of the wear spot. Work from the wrong side of the fabric and weave the needle across the width of the wear, then pull the thread straight. Not tight, which would gather the fabric, but straight so that there is no give and no gather. Turn the needle and do the same weaving stitch back across as close as you reasonably can to the first line of thread.
Continue in that fashion down the length of the worn spot. If there is a wider spot, one where no fibers cross the hole, it will need a slightly different approach.
For a wider, and more worn hole, do the weaving across as at first, until you get down into firm fabric again. Then, turn the needle at right angles and began working back across the hole. So the new line of thread is crossing the first lines you created. Make sure to weave the thread over and under some of the initial repair threads. This will make it more like fabric and less like stitching. Once you have recrossed, check the fabric’s right side. If there are long threads that needed a bit of securing, you can do that with a few more passes of the needle. For securing and making it look like fabric, work the needle from the wrong side, but watch the right side. Weave a few more threads across to secure the loose ones currently there, secure the thread on the wrong side and trim.
The end result is a woven patch, that blends into the original fabric and if you didn’t know it was there it wouldn’t even be seen.
Notes and Variations:
Most woven fabrics can be secured and repaired with normal thread and a “sharp.” Sweaters, knit with yarns that are heavier than thread, can be repaired using a suitable colour and weight of embroidery floss or crafting floss.
While the goal of this mending technique is to make an invisible patch, using a contrasting color thread could make for some interesting design elements if you wanted to be adventurous.
Turning a mend into a design element can be a good way to capitalize on the necessity of mending, without letting the item get a “worn out” look. Instead of being worn out, it becomes unique, artistic, and fun.
Back To You:
What do you find the most frustrating to mend? Have you tried this mending technique before? What is your preferred mending technique if you have one?