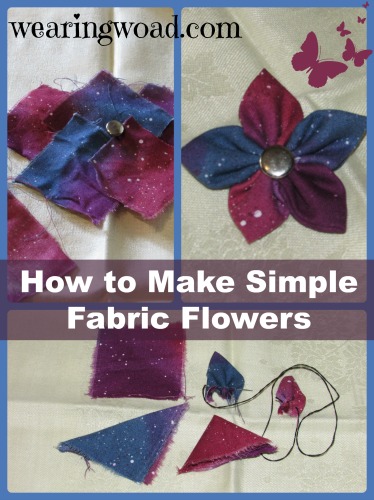
Fabric flowers are an easy and effective way to dress up any up-cycled item. From hats, to shirts, to purses and jewelry, the options for embellishing with fabric flowers are nearly endless. Just as endless as the embellishment possibilities, are the types and patterns available for creating your own fabric flowers. A quick online search can turn up hundreds of patterns, many of which require pattern pieces, or specific fabrics. This fabric flower can be created with whatever fabric scraps you have on hand, and requires no pattern pieces. If you can fold a square, you can make these awesome fabric flowers. 
Having experimented with a few methods of making my own hand-made flowers, I would like to highlight one particularly method. This method involves very little sewing, very little cutting, and makes a cute and stylish flower. It is also very easy to adjust the method to make larger or smaller flowers, and each flower only uses a small amount of fabric.
This flower pattern is ideal for using scraps or odd fabrics, which makes it even better for dressing up an up-cycled garment or hat. These are the flowers I used to embellish my up-cycled designer sun-hat. And since I finished that hat, every time I have worn it I’ve received compliments, especially on the flowers.
How to Make a Simple Fabric Flower:
This flower pattern is for a single layer, five petal flower. While you could potentially do a six petal flower, it would need a larger button for the center, and would be a bit harder to get it to look nice.
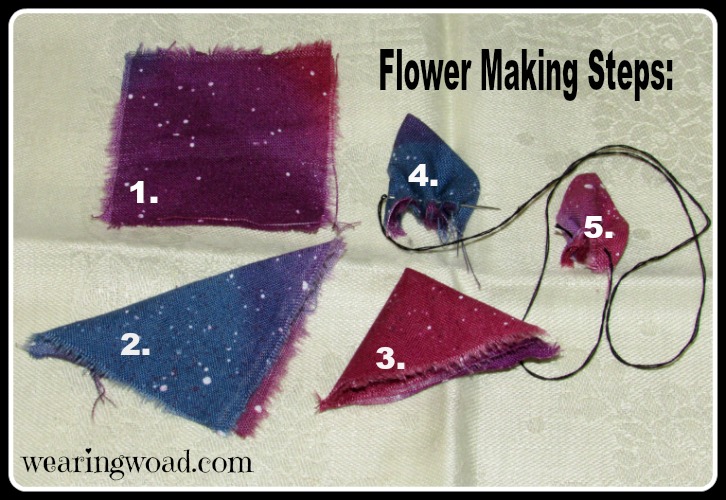
Step 1: Collect your fabric. I used pre-cut quilt squares that I then cut into smaller squares. For the hat, I made one larger flower with approximately 2” by 2” squares, and two smaller flowers with approximately 1” by 1” squares. Provided the fabric can be trimmed to an even square, you can use any fabric around. I’ve made flowers out of old pajamas, pants, and t-shirts.
Step 2: Cut five squares out of your chosen fabric. It is usually easiest to ripe a rectangle that is the width you want, fold a triangle at the end, and cut off the folded triangle to create an even square. Folding a triangle across a rectangle is an origami technique to make sure a square is actually square.
For some of my flowers I use three or four squares of one fabric, and one or two squares of another for contrast. When using scraps, don’t be afraid to experiment and combine fabrics and colours, you never know what a combination will look like until you try it.
Step 3: Fold your first square into a triangle, and then fold the triangle in half. You should have two folded edges, and one longer rough edge. Stitch a running stitch across the rough edge and tightly gather the petal. Your triangle should gather into a simple folded petal.
Step 4: Repeat with the other four squares. The petals should naturally incline into a circle now, if they are tightly gathered. Secure the petals into a circle, and run a few stitches across the back of the flower to fully secure the petals.
Step 5: Stitch a button onto the flower. If you are putting the flower on a hat or other garment, feel free to use the button stitching time as an opportunity to stitch the fabric flower to your item of choice. Remember to tie off the button stitching securely.
Variations On The Basic Five-Petal Fabric Flower:
You can create a flower center from a spare square of fabric if you do not have a button that works with that flower. Simply run a gathering stitch around the square, gather it into a circle, and sew inside the flower. Once the center circle is secured, flatten it to cover the petal’s rough edges.
Flowers with every petal the same, a few accent petals, or every petal different all look awesome, particularly with clear, white, or metal toned buttons. Mother of pearl buttons can also look amazing on these fabric flowers.
You can also make tri-layered flowers, using flowers made from 1”, 2”, and 3” squares. With these, attaching the button would also help secure the three flower layers.
Try using velvets or sheer fabrics for more elegant flowers. Denim, calico, and plaids work well for casual accent flowers. Most quilting fabrics can go either way, so don’t be afraid to experiment. This is one flower pattern that you cannot go wrong with. Actually, mistakes are often amazing things, so don’t be afraid to experiment.
Other Creative Uses For Fabric Flowers:
Besides using fabric flowers for clothing and jewelry embellishments, you can also use the flowers for decorations, card or gift toppers, hair ornaments, and really anything you can think of.
For a simple and non-wilting flower arrangement, make various size fabric flowers but hold the buttons. Instead of securing the buttons to the flowers with thread, use florists wire and pliers to thread the wire through the button and flower, and then twist the wire on itself under the flower. You can also attach fabric leaves to the wire stem. Arrange the flowers into a vase, if the vase is clear you can fill it with glass pebbles, or sand to secure the stems and add another element for visual interest.
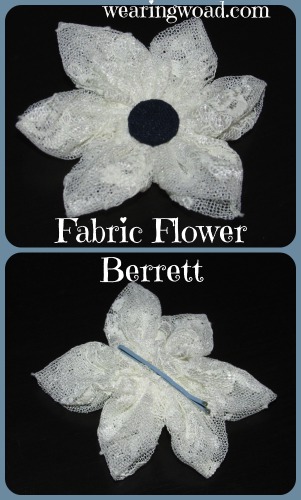
It is very easy to sew smaller fabric flowers onto a broach or earing backing for simple and cute jewelry. Or sew smaller flowers onto bobby pins for a quick hair decoration.
Note:
These flowers are easy and addictive to make. After you have mastered the technique, each flower takes less than five minutes from start to finish. So, after you’ve made one or two, you could very well end up creating a field of fabric flowers because they are just too much fun.
There are also innumerable combinations of fabric and buttons to try, so once you start, who knows how many awesome flowers you can dream up.
Back to You:
What is your favorite fabric flower pattern? If you used this tutorial, how did it go and what did you do with the flowers? I love hearing from you, so leave a comment!